Friday, July 13, 2012

Peanut Butter Chocolate Chip Cookie Brownies

I am most definitely in the mood to bake today. I know it's a little late to get started, but I just couldn't wait till tomorrow! Besides, Adam will be "working" (a.k.a. hanging out with some floozy he's seeing on the side) until, like, super late. I kid. He's seriously working. Dang, don't freak out like that.

So, what to bake you ask? I really wanted to make cookies, but I also really wanted to make cupcakes. However, my cupcake container is occupied.

Clearly, that leaves only one option: peanut butter chocolate chip cookie brownies.
GASP! What a great idea. No, I haven't been "smoking something". Just craving some delicious chocolate treats.

This will surely bring quite the mess, as it requires me to make, not one, but two recipes. Oh, my gosh. I'm just so excited.


First, I made the cookie dough. You know, so I'd have something to munch on while I make the brownie batter. That's some pretty forward thinking, I'd say.

Here are the recipes:

Peanut Butter Chocolate Chip Cookies
Makes 2 dozen.

Ingredients

½ cup Butter
½ cup Peanut butter
½ cup Sugar
½ cup Brown sugar
1 Egg
1 ¼ cups Flour
½ tsp. Baking powder
½ tsp. Baking soda
¼ tsp. Salt
1 cup Chocolate chips

Directions
1.    Preheat oven to 375˚F. Prepare baking sheet. Combine dry ingredients.
2.    Cream butters and sugars.
3.    Add the egg.
4.    Add dry ingredients. Fold in chips
5.    Scoop onto prepared sheet. Bake for 10-12 minutes (5-6 for minis).

Brownies
Makes one 9”x13” pan. All ingredients at room temperature.

Ingredient
1 cup Butter, melted
3 cups Sugar
1 Tbsp. Vanilla
4 Eggs
1 ½ cups Flour
1 cup Cocoa powder
½ tsp. Iodized salt
1 pinch Baking soda
1 cup Chocolate chips

Directions
1.    Preheat oven to 375˚F. Prepare 9“x13” pan. Sift together dry ingredients, excluding sugar.
2.    Cream together butter, sugar, and vanilla.
3.    Beat in eggs, one at a time. Fully incorporate each.
4.    Add dry ingredients gradually. Fold in chocolate chips.
5.    Spread evenly in prepared pan. Bake for 35-40 minutes, or until a toothpick comes out mostly clean.


I think I used Reece's cups instead of chocolate chips in the brownies. Yummmm.


If you don't want another dozen cookies worth of cookie dough left over after the cookie-brownies, you can half the cookie dough recipe. But if you're like me, you'll just eat it. So it's not a problem.


Also, it is imperative that all of your ingredients are at room temperature, especially eggs. It won't hurt you or the eggs to leave them on the counter for an hour before starting the mixing process. In fact, I've heard in Europe they do not refrigerate eggs at all. If your eggs are still cold when you go to add them to your creamed butter and sugar, it will seize up, destroying all your hard work.

So when making the cookie-brownies, I first put a layer of cookie dough. I just scooped it in there as if I were making cookies. You don't have to spread it out, unless, of course, you want to. Then, I poured in all the brownie batter. It's a little thick, so you'll have to spread it to get an even layer.
But that's it. Then you just bake it. I baked it in a 375˚F oven for about 45 minutes.
On an unrelated side note, the pageant moms on Toddlers and Tiaras are ridiculous. I'm glad my mom isn't crazy.
Friday, June 1, 2012

Key Lime Cupcakes using the Two-Stage Mixing Method

Why Hello Again!

I made cupcakes yesterday! Not just any cupcakes. Key Lime Cupcakes. I can almost hear the "ooh's" and the "ahh's" from the audience, clearly on the edge of their seats.

Not only did I make cupcakes that I had never made before, but I used a method of mixing that was also new to me. I believe it is called the "two-stage method" or something... let me just consult google for a moment.

 ...

Yes, the two-stage mixing method is what I used for these cupcakes. Usually, I use the trusty ol' creaming method. You know the one. Butter and sugar creamed together until light in color and fluffy in consistency. Add eggs. Add the combined dry ingredients alternately with the combined wet ingredients. There's a little more to it than that, but that's the gist.

Alas, I have lately been unhappy with the consistency of my cupcakes. They're always a little heavier than I would like. I want light, airy cupcakes. So, on a treasure hunt I went.

And found this, the two-stage mixing method. It is hailed for the tender and velvety cakes it produces. Here's how it works.

First, bring all ingredients to room temperature. Any butter, eggs, milk or what-have-you need to be at room temperature (about 68°F). Then, you combine all dry ingredients, including sugar. Mix thoroughly with a whisk to evenly distribute leavening agents and salt. Next, combine all liquid ingredients. Eggs, milk, flavorings, whatever. Mix 'em all up. Make sure to break up the eggs.

Okay, this is what you should have. Dry ingredients in your main bowl. Wet ingredients in a pourable bowl. And your fat, chopped into smaller pieces on the side.

Now, the fat goes into the dry ingredients. That's right, add it all in there. Mix on low for a little while. Just to kind of break apart the fat and coat it with the flour. Add a small amount of the wet ingredients to bring the dry ingredients together. I'd say no more than a quarter of the wet ingredients. Then, mix it on medium for about two minutes, maybe a little less, to aerate the batter. Make sure to scrape the bowl a lot. It will not get evenly mixed, otherwise.

Cool, here comes the namesake of the method! Add the rest of the liquid ingredients in two additions, mixing only slightly to combine. And that's it. Bake it!

But here's the science:

When you add water to flour, the glutens start to produce. Don't know what a gluten is? A gluten is a protein created from wheat. It is great when you're making bread. The more you work the dough, the more the glutens develop. It makes for that awesome chewy texture of bread. But in cakes, you don't want chewy. So you need something to inhibit the development of the glutens.

That's where the sugar and butter come in. Sugar steals away the moisture that would normally develop the gluten. That's why you only add a small amount of wet ingredients. Butter coats the flour to further prevent the gluten formation. You could even take this a step further by separating the eggs. Adding the yolks with the butter really helps suppress the gluten.

And there you have it. A more tender cake. Light. Airy. Moist. And oddly enough, less of a mess than usual.

There are some con's to this method. If you are making, say, a large castle out of cake, you probably want to use the creaming method. The two-stage mixing method makes for a more delicate cake, and, therefore, less structurally sound. Compared to the creaming method, it will not rise as much, either. But the texture is luscious.

Now that I've thoroughly bored you with the science of baking (for the first time, and certainly not the last. Science is cool!!!), here's the recipe.


Key Lime Cupcakes, makes 18 cupcakes

For the Cake:
1 cup butter
1 cup sugar
2 cups flour
1 Tablespoon baking powder
1/2 teaspoon salt
4 eggs
1 teaspoon vanilla

For the Filling:

1/3 cup key lime juice
14 ounce can of condensed milk

For the Meringue:
3 egg whites
1/4 teaspoon lime juice
1/3 cup sugar

Procedure:

For the cake, use the two-stage mixing method. Bake at 350°F for 20 minutes, until tops are golden. Cool 5 minutes in the pan. Remove to rack to finish cooling. Core cupcakes. Reserve cores.

For the filling, mix the lime juice and condensed milk together. The mixture will thicken and become oh-my-gosh amazing. Fill cupcakes. Cap cupcakes with the top third of the core.

For the meringue, whip whites and lime juice to soft peaks. Gradually add the sugar while whipping. Whip to stiff peaks. Spoon or pipe onto cupcakes (if you pipe, use a round tip with no obstructions; they will deflate the meringue). Bake at 450°F for 3 to 5 minutes, until golden brown.

Saturday, May 26, 2012

Introduction!!

Hello everyone!

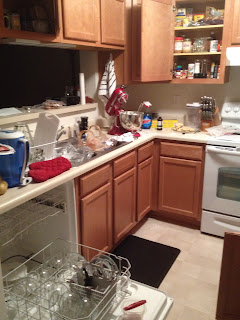
I'm aware that at this point "everyone" is just me talking to myself. Regardless, welcome to my incredibly messy kitchen.


My name is Carissa. I'm currently going to culinary school in hopes to one day own a bakery or a restaurant, or be a personal chef, or be a Food Network personality, or move to a more tropical location than central Illinois. Any place a little warmer during the winter months would be great.

Anyway. I decided that it was probably time to organize my thoughts, ideas, inspirations, and knowledge into one location. Since my brain just hasn't been cutting it, I thought what better place than a blog!

And that's pretty much what you'll find here: my thoughts and inspirations mixed with a little of my own knowledge and a little knowledge from Google and a few of my favorite recipes. I intend on throwing in a "culinary word of the day", but we'll have to see how that goes.

As you can probably tell from the title of my blog, I'm not the most organized in the kitchen. I make a monstrosity out of it when I cook, to be quite honest.

However, this is not to be confused with dirty. I, sir, am a very clean person. I bathe daily. I brush my teeth. I wash my hands. After I wreck the kitchen, I clean up my mess (sometimes). Sometimes, I make my fiance Adam clean it. Okay, I don't MAKE him. But I just tell him how hard I worked on those amazing cookies and how my legs hurt so much. And somehow, the kitchen gets clean.

Well, enough about me for now. It is almost past my bed time. Hopefully, I will be writing again soon. Until then, go terrorize your own kitchen!